using System;
using System.Collections.Generic;
using System.ComponentModel;
using System.Linq;
using System.Text;

namespace MyMagicEnumConverter
{
   #region MyMagicEnumConverter
   public class MyMagicEnumConverter<TENUM, TATTR> :
      StringConverter where TATTR : MyNameBaseAttribute
   {

      public override bool GetStandardValuesSupported(
         ITypeDescriptorContext context)
      {
         return true;
      }

      public override bool GetStandardValuesExclusive(
         ITypeDescriptorContext context)
      {
         return true;
      }

      public override StandardValuesCollection GetStandardValues(
         ITypeDescriptorContext context)
      {
         List<String> values = new List<String>();

         foreach (var item in Enum.GetNames(typeof(TENUM)))
         {
            System.Reflection.MemberInfo[] mi = typeof(TENUM).GetMember(item);

            Object[] attributes = mi[0].GetCustomAttributes(typeof(TATTR), false);

            if (attributes.Length > 0)
               values.Add(((TATTR)attributes[0]).Name);
            else
               values.Add(item);
         }

         return new StandardValuesCollection(values);
      }

      public override bool CanConvertFrom(ITypeDescriptorContext context,
         Type sourceType)
      {
         if (sourceType == typeof(String))
            return true;

         return base.CanConvertFrom(context, sourceType);
      }

      public override object ConvertFrom(ITypeDescriptorContext context,
         System.Globalization.CultureInfo culture, object value)
      {
         if (value != null && value.GetType() == typeof(String))
         {
            foreach (var item in Enum.GetNames(typeof(TENUM)))
            {
               System.Reflection.MemberInfo[] mi = typeof(TENUM).GetMember(item);

               Object[] attributes = mi[0].GetCustomAttributes(typeof(TATTR), false);

               if (attributes.Length > 0)
               {
                  if (Convert.ToString(value) == ((TATTR)attributes[0]).Name)
                     return Enum.Parse(typeof(TENUM), item);
               }
            }

            return Enum.Parse(typeof(TENUM), Convert.ToString(value));
         }

         return base.ConvertFrom(context, culture, value);
      }


      public override bool CanConvertTo(ITypeDescriptorContext context,
         Type destinationType)
      {
         if (destinationType == typeof(TENUM))
            return true;

         return base.CanConvertTo(context, destinationType);
      }


      public override object ConvertTo(ITypeDescriptorContext context,
         System.Globalization.CultureInfo culture, object value, Type destinationType)
      {
         if (value != null && value.GetType() == typeof(TENUM))
         {
            System.Reflection.MemberInfo[] mi =
               ((TENUM)value).GetType().GetMember(value.ToString());

            Object[] attributes = mi[0].GetCustomAttributes(typeof(TATTR), false);

            if (attributes.Length > 0)
               return ((TATTR)attributes[0]).Name;
            else
               return Convert.ToString(value);
         }

         return base.ConvertTo(context, culture, value, destinationType);
      }

   }
   #endregion
}
|
|
|
|
|
|
|
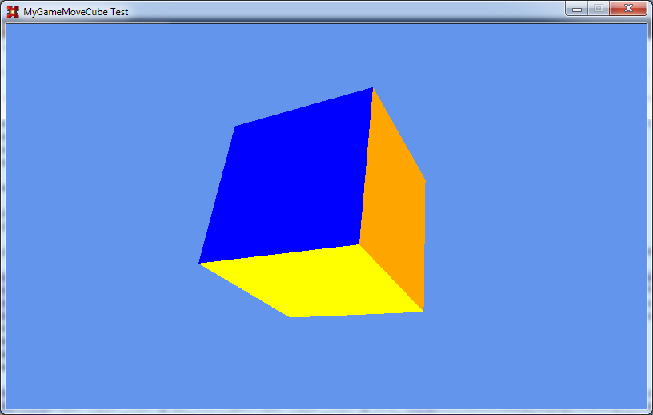
In questo esempio vengono caricati i vertici di un cubo e mediante mouse vengono applicate trasformazione per ruotare e scalare l'oggetto 3D.
Per visualizzare e gestire la visualizzazione del solido creato viene utilizzata la classe Game, le operazioni di rotazione e zoom avvengono intercettando i movimenti del mouse mediante i messaggi tradizionali di windows ed alternativamente mediante DirectInput.
Per relalizzare questo esempio e' stata utilizzata la versione 2.5.0 di SharpDX, SharpDX e' una libreria fondata su DirectX o meglio e' un wrapper per .NET delle DirectX.
|
|
|
Quartz.NET e' una libreria utile per pianificare l'esecuzione di operazioni ad istanti temporali predefiniti. Per creare un'operazione pianificabile e' necessario:
- Creare uno Scheduler, ovvero l'oggetto responsabile dell'esecuzione delle operazioni al verificarsi delle condizioni stabilite.
- Creare un Job, ovvero l'operazione da eseguire al verificarsi delle condizioni. Dal punto di vista informatico occorre creare una classe che implementa l'interfaccia Quartz.IJob.
- Creare un Trigger, ovvero l'oggetto che determina il momento in cui una determinata operazione deve essere eseguita.
Creo il Job:
using System;
using System.Collections.Generic;
using System.Linq;
using System.Text;
using Quartz;
using Quartz.Impl;

namespace TestQuartz
{
   public class MyJob : IJob
   {
      public void Execute(IJobExecutionContext context)
      {
         Console.WriteLine("MyJob Execute: {0}", context.JobDetail.Key);
      }
   }
}
|
|
|
Questo articolo e' una estensione del precedente Use ASP.NET SqlMemberShipProvider in WCF self-hosted service in cui viene abilitato il supporto SSL per garantire la sicurezza delle informazioni. Per informazioni su come installare in supporto SSL su un servizio WCF self-hosted si rimanda all'articolo Configurare un servizio WCF WebHttpBinding self hosted con SSL.
using System;
using System.Collections.Generic;
using System.IO;
using System.Linq;
using System.Security.Permissions;
using System.ServiceModel;
using System.ServiceModel.Activation;
using System.ServiceModel.Web;
using System.Text;

namespace WcfServiceHTTPSSelfHosted
{
   public class WcfServiceHTTPSSelfHosted : IWcfServiceHTTPSSelfHosted
   {
      [PrincipalPermission(SecurityAction.Demand, Role = "Managers")]
      public string GetData1(int value)
      {
         return string.Format("GetData1 you entered: {0}", value);
      }

      public string GetData2(int value)
      {
         if (System.Web.Security.Roles.IsUserInRole("Registered Users"))
         {
            return string.Format("GetData2 you entered: {0}", value);
         }
         else
         {
            throw new Exception("Role validation failed");
         }
      }

      public string GetData3(int value)
      {
         return string.Format("GetData3 you entered: {0}", value);
      }
   }
}
|
|
|
L'utilizzo dei meccanismi di autenticazione di ASP.NET in WCF risulta essere molto comodo per gestire l'autenticazione degli utenti che voglioni accedere al servizio mediante i costrutti di base che in generale .NET mette a disposizione gestire le autorizzazioni all'esecuzione di porzioni di codice differenti.
Questo esempio e' realizzato mediante webHttpBinding e basicHttpBinding in quanto i piu' utilizzati ma anche i piu' ostici per via dei numerosi vincoli imposti dalla tecnologia su cui sono basati.
Il provider ASP.NET che viene utilizzato e' il SqlMemberShipProvider, quindi e' necessario creare un database utile a contenere tutte le tabelle di gestione utenti, ruoli, diritti, ecc...
using System;
using System.Collections.Generic;
using System.IO;
using System.Linq;
using System.Security.Permissions;
using System.ServiceModel;
using System.ServiceModel.Activation;
using System.ServiceModel.Web;
using System.Text;

namespace WcfServiceHTTPSelfHosted
{
   public class WcfServiceHTTPSelfHosted : IWcfServiceHTTPSelfHosted
   {
      [PrincipalPermission(SecurityAction.Demand, Role = "Managers")]
      public string GetData1(int value)
      {
         return string.Format("GetData1 you entered: {0}", value);
      }

      public string GetData2(int value)
      {
         if (System.Web.Security.Roles.IsUserInRole("Registered Users"))
         {
            return string.Format("GetData2 you entered: {0}", value);
         }
         else
         {
            throw new Exception("Role validation failed");
         }
      }

      public string GetData3(int value)
      {
         return string.Format("GetData3 you entered: {0}", value);
      }
   }
}
|
|
|
Per creare un servizio in grado di supportare l'installazione multipla e' sufficiente modificare il nome del servizio ad ogni installazione, quindi per semplicita' si puo' utilizzare un "Application Configuration File" in cui viene specificato il nome del servizio:
<?xml version="1.0" encoding="utf-8" ?>
<configuration>
   <appSettings>
      <add key="ServiceName" value="Service Instance 1"/>
   </appSettings>
</configuration>
Per fare in modo che il nome del servizio venga definito dal file di configurazione e' necessario scrivere qualche riga di codice all'interno della classe di installazione:
using System;
using System.Collections;
using System.Collections.Generic;
using System.ComponentModel;
using System.Configuration;
using System.Configuration.Install;
using System.Linq;
using System.Reflection;
using System.ServiceProcess;

namespace MultipleInstanceService
{
   [RunInstaller(true)]
   public partial class ProjectInstaller : System.Configuration.Install.Installer
   {
      public ProjectInstaller()
      {

         InitializeComponent();

         serviceInstaller1.ServiceName = GetConfigurationValue("ServiceName");
      }

      private string GetConfigurationValue(string key)
      {
         Assembly service = Assembly.GetAssembly(typeof(ProjectInstaller));
         Configuration config =
		ConfigurationManager.OpenExeConfiguration(service.Location);
         if (config.AppSettings.Settings[key] != null)
         {
            return config.AppSettings.Settings[key].Value;
         }
         else
         {
            throw new IndexOutOfRangeException("Requested key no found:" + key);
         }
      }
   }
}
A questo punto possiamo creare istanze multiple semplicenmente modificando il nome del servizio nel file di configurazione:
C:\Windows\system32>installutil.exe
"C:\Works\MultipleInstanceService\build\MultipleInstanceService.exe"
|
|
|
Quando si crea un Windows Communication Foundation self-hosted che utilizza SSL, è necessario configurare una porta con certificato X.509. Quindi dopo aver creato il servizio ed averlo opportunamente configurato per utilizzare il protocollo SSL occorre:
- Utilizzare netsh per aggiungere una prenotazione dello spazio dei nomi per la porta da utilizzare (50001):
C:\Windows\system32>netsh http add urlacl url=https://+:50001/ user=EVERYONE
- Creare un certificato ROOT da utilizzare per firmare il sertificato del server:
makecert.exe -sk RootCA -sky signature -pe -n CN=localhost -r
-sr LocalMachine -ss Root MyRootCA.cer
- Creare il certificato del server:
makecert.exe -sk server -sky exchange -pe -n CN=localhost -ir LocalMachine -is Root
-ic MyRootCA.cer -sr LocalMachine -ss My MyTestCert.cer
- una volta crearo il sertificato del server occorre collagarlo alla porta utilizzata dal servizio, per farlo utilizziamo una piccola applicazione di utility:
X509Certificate2 certificate = new X509Certificate2("MyTestCert.cer");

Process netsh = new Process();

netsh.StartInfo.FileName =
   Path.Combine(Environment.GetFolderPath(Environment.SpecialFolder.SystemX86),
   "netsh.exe");

netsh.StartInfo.Arguments =
   String.Format("http add sslcert ipport=0.0.0.0:{0} certhash={1} appid={{{2}}}",
   50001, certificate.Thumbprint, "49e33699-ca14-42cf-bd09-00675942b894");

netsh.Start();
netsh.WaitForExit();
in alternativa e' possibile utilizzare il comando:
Snippet
netsh http add sslcert ipport=0.0.0.0:50001 certhash=
f97d7e0ca58e8bb1acccf46c0f42d9b8934cddec appid=
{49e33699-ca14-42cf-bd09-00675942b894}
dove certhash puo' essere ricavato dalla proprieta' Thumbprint del certificato (MyTestCert.cer in questo caso):
Snippet
f97d7e0ca58e8bb1acccf46c0f42d9b8934cddec
mentre appid e' il guid dell'applicazione che ospita il servizio, ricavabile dal file AssemblyInfo.cs:
// The following GUID is for the ID of the typelib if this project is exposed to COM
[assembly: Guid("49e33699-ca14-42cf-bd09-00675942b894")]
- Quindi possiamo verificare il funzionamento del servizio WCF con protocollo SSL:
https://localhost:50001/WcfServiceHTTPSSelfHosted/GetData?value=44
che ritorna il seguente risultato:
<string xmlns="http://schemas.microsoft.com/2003/10/Serialization/">
You entered: 44</string>
- Per visualizzare le porte prenotate:
Snippet
netsh http show urlacl
- Per eliminare un aprenotazione su una specifica porta:
Snippet
netsh http delete urlacl url=https://+:50001/
- Per eliminare un certificato:
Snippet
netsh http delete sslcert ipport=0.0.0.0:50001
- Per visualizzare i certificati collegati ad una porta:
Snippet
netsh http show sslcert ipport=0.0.0.0:50001
|
|
|
In questo esempio viene creato un servizio semplice WCF con webHttpBindng quindi viene configurato IIS per abilitare il protocollo SSL su di esso. Di seguito la procedura da seguite per abilitare SSL su un servizio presente in IIS: - aprire Internet Information Service
- selezionare Server Certificates
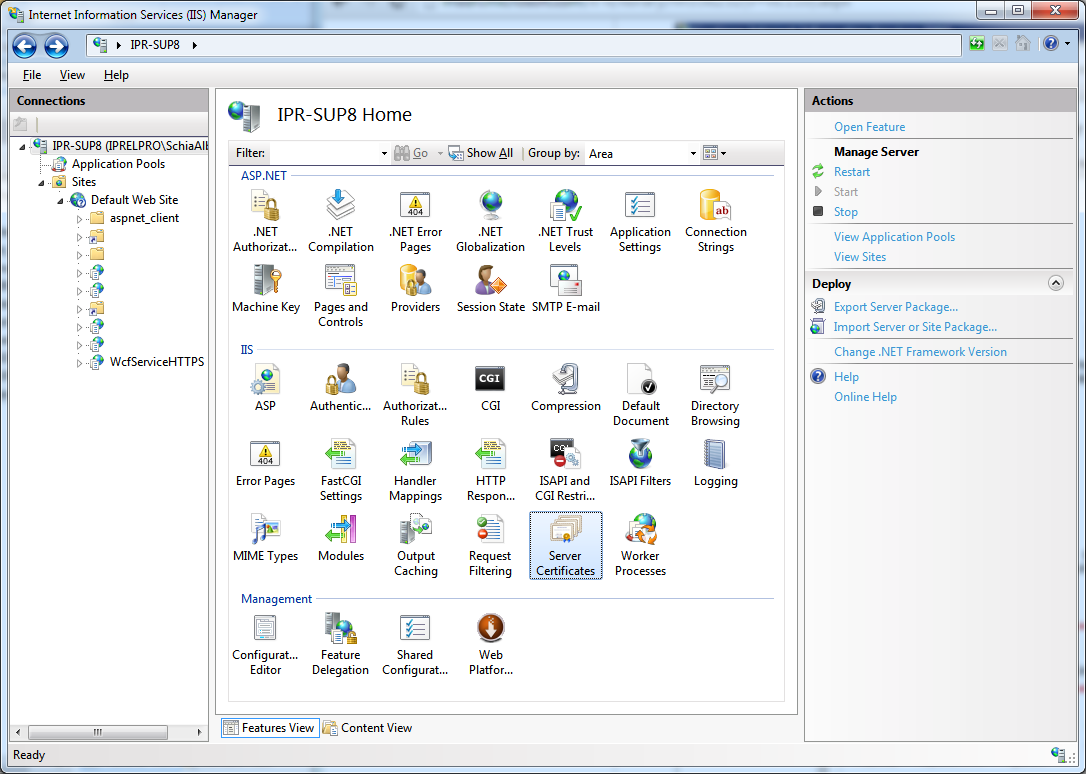 - click su Create Self-Signed Certificate...
- inserire un nome per il certificato auto firmato
- espandere la cartella Sites e quindi selezionare Default Web Site
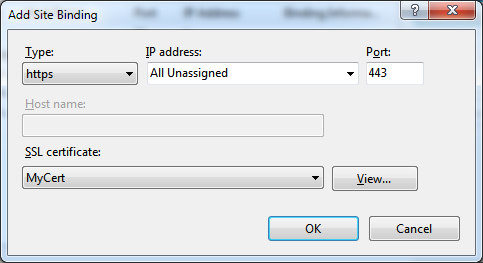
- nella finestra Actions click su Bindings...
- configurare il protocollo https per il certificato creato
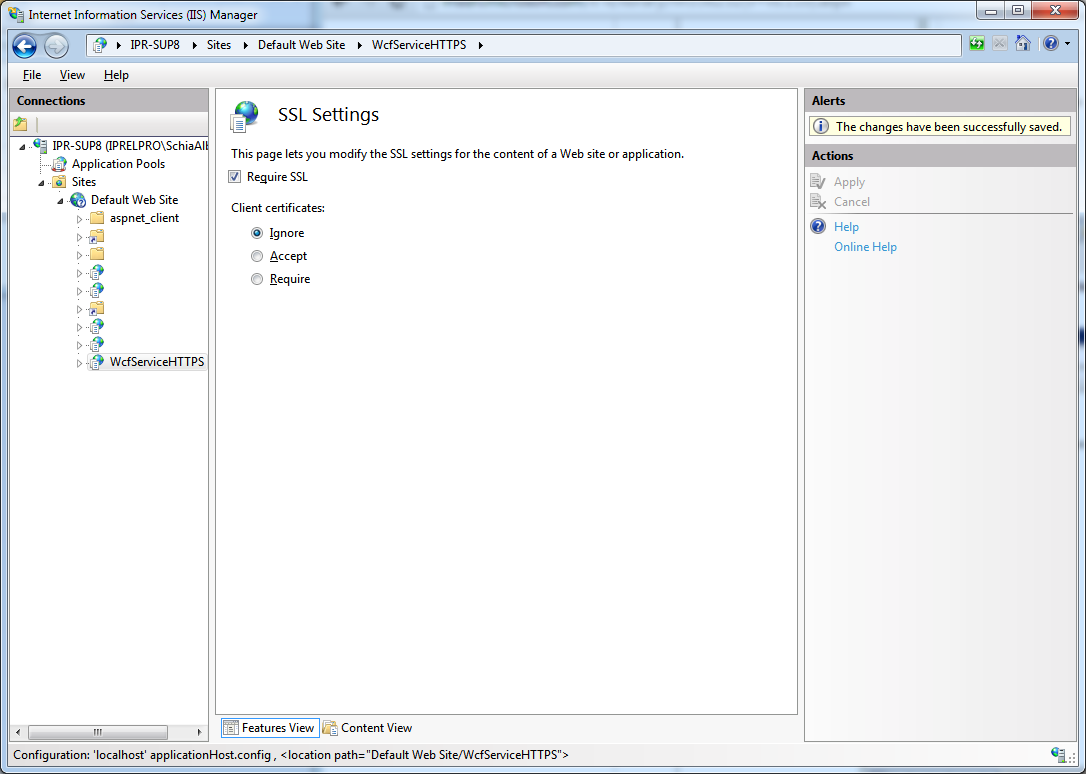
 - selezionare SSL Settings dal servizio a cui applicare il protocollo https
 Il file di configurazione del servizio deve essere adeguatamente configurato per applicare il protocollo SSL alle richieste: xml version="1.0"?> <configuration> <startup useLegacyV2RuntimeActivationPolicy="true"> <supportedRuntime version="v4.0"/> startup> <system.serviceModel> <bindings> <webHttpBinding> <binding name="secureWebBinding"> <security mode="Transport"> <transport clientCredentialType="None"/> security> binding> webHttpBinding> bindings> <behaviors> <endpointBehaviors> <behavior name="webHttpEndpointBehavior"> <webHttp helpEnabled="true" /> behavior> endpointBehaviors> <serviceBehaviors> <behavior name="webHttpServiceBehavior"> <serviceMetadata httpGetEnabled="true" /> <serviceDebug includeExceptionDetailInFaults="false"/> <serviceThrottling /> behavior> serviceBehaviors> behaviors> <services> <service behaviorConfiguration="webHttpServiceBehavior" name="WcfServiceHTTPS.Service"> <endpoint address="" behaviorConfiguration="webHttpEndpointBehavior" binding="webHttpBinding" bindingConfiguration="secureWebBinding" name="webHttpEndPoint" contract="WcfServiceHTTPS.IWcfServiceHTTPS" /> <host> <baseAddresses> <add baseAddress="http://localhost/WcfServiceHTTPS/" /> baseAddresses> host> service> services> system.serviceModel> configuration> A questo punto e' possibile chiamare il servizio WCF mediante protocollo https: 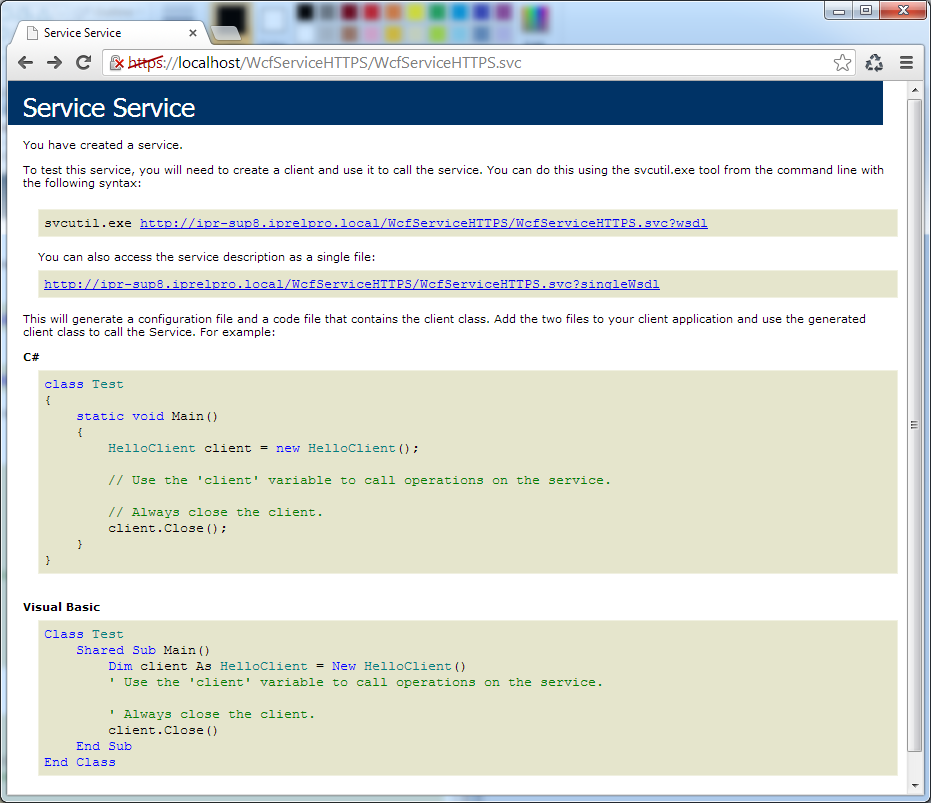

|
|
|
Un po' di esempi su come cifrare e decifrare dati in .NET:
using System;
using System.Collections;
using System.Collections.Generic;
using System.IO;
using System.Linq;
using System.Security.Cryptography;
using System.Text;
namespace TestEncryptDecrypt
{
class Program
{
const String PASSWORD_HASH = "p@ssW0rd";
const String SALT_KEY = "s@l7_K&y";
const String VI_KEY = "@!2#&46%%64!@";
const String TRIPLE_DES_KEY = "23jiefjneu5474bcaio48rhe";
const String RSA_PRIVATE_KEY = "<RSAKeyValue>" +
"<Modulus>wVe/eITmOuNLD1oSUrOsQHvG11m/kQpxkbAPMZxXGNDmKqdLj3BdRYp35hjNGh" +
"CNR4l2dGy4+Y9HVo+tHwHiuoBoSYm3/79C2Ars3mue+MkWZ6gCdn21WHtUmMOLtqeNLrKzX" +
"WpihI7MzZbK9bFfHK9f4w+O/ssuGo2628VYE2M=</Modulus>" +
"<Exponent>AQAB</Exponent>" +
"<P>7Tqlq/oXjTHWzmhNzbNOnBRaKotYZC/p4584ZSvlGjVkG7vdvuWFRe6gMkaOA1Zc9VVP" +
"pd+jHi6ihYN/WZbtKw==</P>" +
"<Q>0KQhxIC0zSQJKM2736fm8tiupnS9bTF/rg5YiY4NTbKLMNwJsg8rTWl27+knS6QDBUu/u" +
"u182aTa6hPzozOGqQ==</Q>" +
"<DP>LiyAGp0vAFh3Cu3aVvNTlaWQdz9wEPASgi93dpm4mgVSWuOSIZni+t2baK267oNczJOy" +
"UQLaaQGCuKIDo5hwyQ==</DP>" +
"<DQ>qMbNRh9zoqru+eILg65YJcTg62huP+GVzqBuQL/3xQ2UiW7GLRMWTWXuP77U+dxwUR1o" +
"uPcaUxmHuWlwYmnxGQ==</DQ>" +
"<InverseQ>etPo41x9UGcYrsVaMeMsTTvUT9l5bYFigkWfkP1nGHwlzi/7FJjs38D6KoglPd" +
"eU7HYhnc76ud3VMDBbXldIZw==</InverseQ>" +
"<D>MgsHSSeE++sG65NRuMw+onYnMmhNeDouyRm75QhlVswDNzkUCq13xt8fR5RVyhBMsR54Z" +
"YwamKWoPlRz59myGEZqFx13RM0ztMZNhWU13ts4CA8401LnaqhZjmJcZSJgIDfKlc+YyMyGG" +
"g+2e4S8NEfIOLw7+/PSuWYqnh2C4rE=</D>" +
"</RSAKeyValue>";
const String RSA_PUBLIC_KEY = "<RSAKeyValue>" +
"<Modulus>wVe/eITmOuNLD1oSUrOsQHvG11m/kQpxkbAPMZxXGNDmKqdLj3BdRYp35hjNGhCN" +
"R4l2dGy4+Y9HVo+tHwHiuoBoSYm3/79C2Ars3mue+MkWZ6gCdn21WHtUmMOLtqeNLrKzXWpih" +
"I7MzZbK9bFfHK9f4w+O/ssuGo2628VYE2M=</Modulus>" +
"<Exponent>AQAB</Exponent>" +
"</RSAKeyValue>";
static void Main(string[] args)
{
String plainText = "prova di cifratura stringa 1 &^'-_=";
String encrypt = EncryptRijndael(plainText);
String decrypt = DecryptRijndael(encrypt);
encrypt = EncryptTripleDES(plainText);
decrypt = DecryptTripleDES(encrypt);
encrypt = EncryptRSA(plainText);
decrypt = DecryptRSA(encrypt);
String hash = GetMd5Hash(plainText);
}
public static string EncryptRijndael(string plainText)
{
byte[] plainTextBytes = Encoding.UTF8.GetBytes(plainText);
using (Rfc2898DeriveBytes rfc2898DeriveBytes =
new Rfc2898DeriveBytes(PASSWORD_HASH, Encoding.ASCII.GetBytes(SALT_KEY)))
{
byte[] keyBytes = rfc2898DeriveBytes.GetBytes(256 / 8);
using (var symmetricKey =
new RijndaelManaged() { Mode = CipherMode.CBC,
Padding = PaddingMode.Zeros })
{
var encryptor =
symmetricKey.CreateEncryptor(keyBytes,
Encoding.ASCII.GetBytes(VI_KEY));
byte[] cipherTextBytes;
using (var memoryStream = new MemoryStream())
{
using (var cryptoStream =
new CryptoStream(memoryStream, encryptor,
CryptoStreamMode.Write))
{
cryptoStream.Write(plainTextBytes, 0, plainTextBytes.Length);
cryptoStream.FlushFinalBlock();
cipherTextBytes = memoryStream.ToArray();
}
}
return Convert.ToBase64String(cipherTextBytes);
}
}
}
public static string DecryptRijndael(string encryptedText)
{
byte[] cipherTextBytes = Convert.FromBase64String(encryptedText);
using (Rfc2898DeriveBytes rfc2898DeriveBytes =
new Rfc2898DeriveBytes(PASSWORD_HASH, Encoding.ASCII.GetBytes(SALT_KEY)))
{
byte[] keyBytes = rfc2898DeriveBytes.GetBytes(256 / 8);
using (var symmetricKey =
new RijndaelManaged() { Mode = CipherMode.CBC,
Padding = PaddingMode.None })
{
var decryptor =
symmetricKey.CreateDecryptor(keyBytes,
Encoding.ASCII.GetBytes(VI_KEY));
using (var memoryStream = new MemoryStream(cipherTextBytes))
{
using (var cryptoStream =
new CryptoStream(memoryStream, decryptor,
CryptoStreamMode.Read))
{
byte[] plainTextBytes = new byte[cipherTextBytes.Length];
int decryptedByteCount =
cryptoStream.Read(plainTextBytes, 0, plainTextBytes.Length);
return Encoding.UTF8.GetString(plainTextBytes, 0,
decryptedByteCount).TrimEnd("\0".ToCharArray());
                  }
               }
            }
         }
      }

      public static string EncryptTripleDES(string plainText)
      {
         using (TripleDESCryptoServiceProvider des =
            new TripleDESCryptoServiceProvider())
         {
            des.Mode = CipherMode.ECB;
            des.Key = System.Text.Encoding.ASCII.GetBytes(TRIPLE_DES_KEY);

            des.Padding = PaddingMode.PKCS7;
            using (ICryptoTransform DESEncrypt = des.CreateEncryptor())
            {
               Byte[] Buffer = ASCIIEncoding.ASCII.GetBytes(plainText);

               return Convert.ToBase64String(
                  DESEncrypt.TransformFinalBlock(Buffer, 0, Buffer.Length));
            }
         }
      }

      public static string DecryptTripleDES(string encryptedText)
      {
         using (TripleDESCryptoServiceProvider des =
            new TripleDESCryptoServiceProvider())
         {
            des.Mode = CipherMode.ECB;
            des.Key = System.Text.Encoding.ASCII.GetBytes(TRIPLE_DES_KEY);

            des.Padding = PaddingMode.PKCS7;
            using (ICryptoTransform DESEncrypt = des.CreateDecryptor())
            {
               Byte[] Buffer =
		Convert.FromBase64String(encryptedText.Replace(" ", "+"));

               return Encoding.UTF8.GetString(
                  DESEncrypt.TransformFinalBlock(Buffer, 0, Buffer.Length));
            }
         }
      }

      static String EncryptRSA(String plainText)
      {
         Byte[] bytes = System.Text.Encoding.Unicode.GetBytes(plainText);

         using (RSACryptoServiceProvider rsa = new RSACryptoServiceProvider())
         {
            rsa.FromXmlString(RSA_PUBLIC_KEY);
            return Convert.ToBase64String(rsa.Encrypt(bytes, false));
         }
      }

      static String DecryptRSA(String ciphertext)
      {
         using (RSACryptoServiceProvider rsa = new RSACryptoServiceProvider())
         {
            rsa.FromXmlString(RSA_PRIVATE_KEY);

            Byte[] decrypt = rsa.Decrypt(Convert.FromBase64String(ciphertext), false);

            return System.Text.Encoding.Unicode.GetString(decrypt);
         }
      }

      static string GetMd5Hash(string input)
      {
         using (MD5 md5Hash = MD5.Create())
         {
            byte[] data = md5Hash.ComputeHash(Encoding.UTF8.GetBytes(input));

            StringBuilder sBuilder = new StringBuilder();

            for (int i = 0; i < data.Length; i++)
               sBuilder.Append(data[i].ToString("x2"));

            return sBuilder.ToString();
         }
      }
   }
}
|